The tar command in Linux is used to create, modify and extract files from an archive. System administrators rely on tar to compress large files and directories for backup and transfer purposes.
Tar can also be used to create archives for software distribution and others purposes.
A simple description, tar is a program to take multiple files and store them into a single file.
How to tar a file in linux
Before throwing complicated commands at you, it might be helpful to understand the basic options.
To create a new archive of the entire directory called logs:
tar -cvf logs.tar logs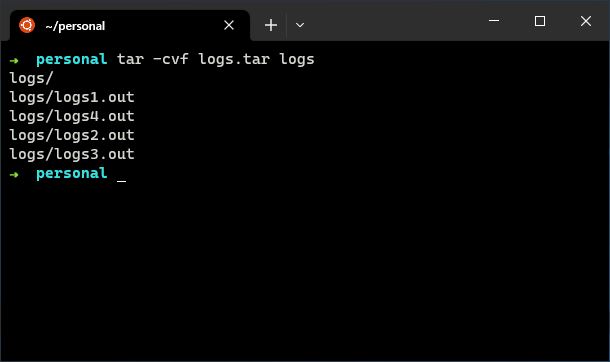
With this command we took the directory called logs and the contents of that directory and stored them in an single file called logs.tar.
Tar Options Used:
-c, --create: create a new archive
-v, --verbose: list output of the command
-f, --file: file to create or use
In these examples the v option is optional, it’s not required and only serves in printing verbose output of the command to the screen.
It should be noted that when you create an archive, by default it saves the archive in the current directory you are in. If you wish to save it to another directory, execute the command with the full path file name.
If your current directory is /tmp, but you want to save the archive to /tmp/logs2, you would execute the command as follows.
tar -cvf /tmp/logs2/logs.tar log/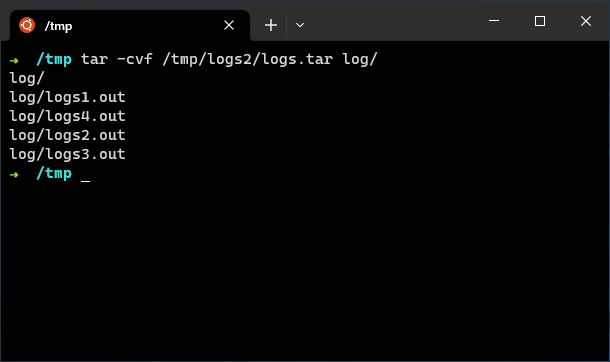
To view the contents of logs.tar in /tmp/logs2 directory.
tar -tf /tmp/logs2/logs.tar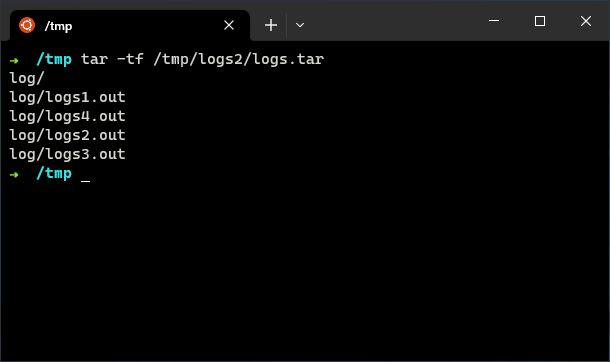
The -t option prints the list of files and directories in /tmp/logs2/logs.tar on the screen.
How to untar a file
To untar a file use the x option. When extracting an archive be mindful of your current working directory. The archive will be extracted to the current working directory unless otherwise specified.
In this example, I tarred up the /tmp/log directory. If I untar that archive into /tmp I could potentially overwrite current data in /tmp/log. If this is your intended goal, then no worries.
Here I removed the existing log directory to demonstrate extracting the archive of logs.tar.
tar -xvf logs.tar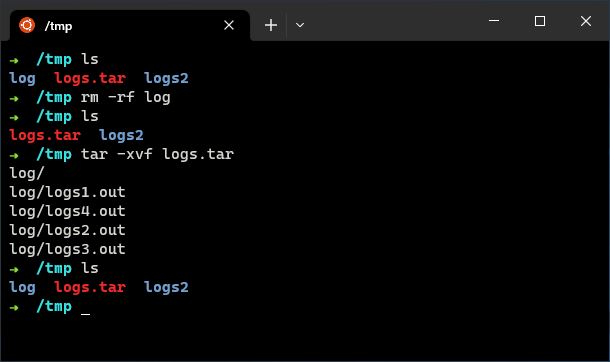
To extract the archive to a specific directory, use the -C option with the path of the directory.
tar -xvf logs.tar -C logs2/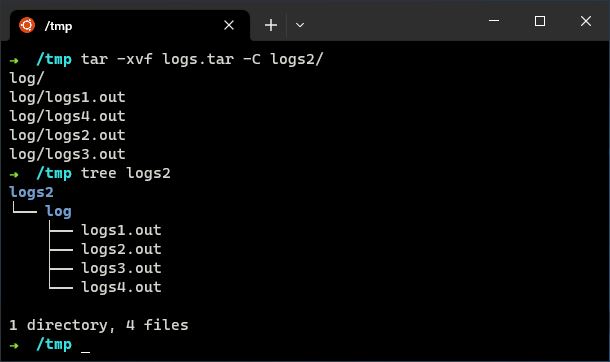
These are the basic tar commands, there are of course other options that extend the benefits of tar.
How to create a gz file
In the above examples, we’ve only gathered files & directories into one archive file. The resulting .tar files would essentially be the same size as all the files added up.
If you’re goal is to save space then you need to tar the file with compression to reduce the file size. To do this we can add an additional option to the existing commands.
The z option in this example filters the tar command through gzip compression to reduce the file size of the archived files.
tar -czvf logs.tar.gz log

# file logs.tar.gz
logs.tar.gz: gzip compressed data, from Unix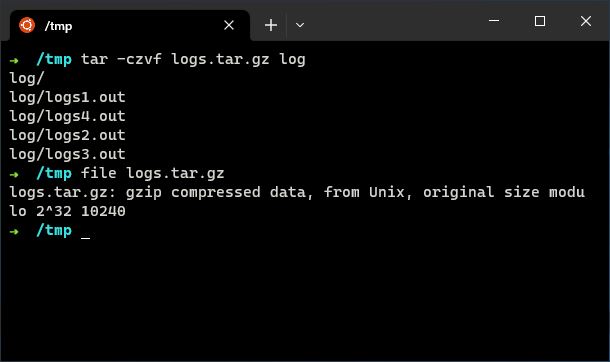
Alternatively and quicker is to use the .tgz extension.
tar -czvf logs.tgz /tmp/log/

# file logs.tgz
logs.tgz: gzip compressed data, from Unix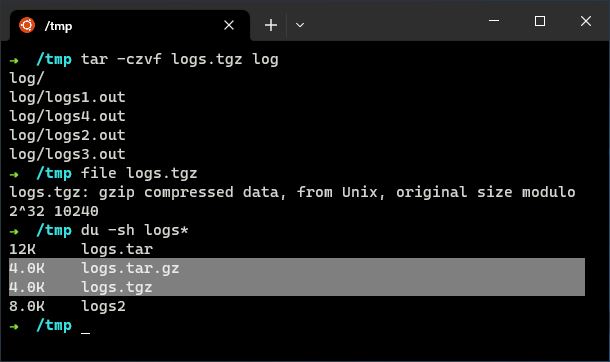
The compressed archives are the same file format and file size, but the name extension is shorter.
Compared to the uncompressed log.tar file type the compressed collection of files are much smaller.
We can also use other compression filters within the tar command.
tar -cjvf logs.tar.bz2 /tmp/log/The lower case –j option filters tar through bzip2 algorithm.
tar -cJvf logs.tar.xz /tmp/log/The upper case –J option filters tar through xz.
There are a few other compression options but these are the most popular used.
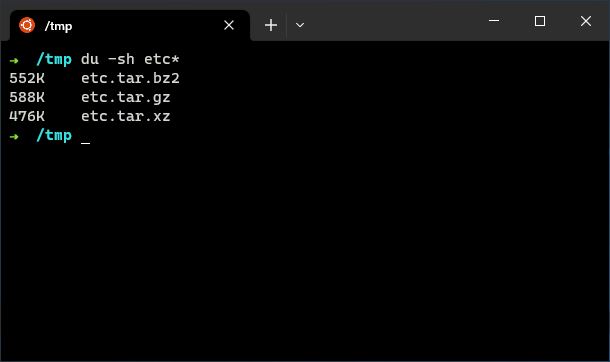
In my quick test of each, the option for gzip wasn’t the best result. The xz filter actually resulted a much smaller file.
Bzip2 compression even resulted in a smaller archive than gzip.
These 2 took a bit longer to run so I assume the compression ratio is higher with xz and bzip2 compared to gzip.
How to view a tar.gz file
To view the list of file names in a compressed file, it’s a very similar command from above.
You will need to include the option for the compression filter you used with -t to list contents.
tar -tzf logs.tar.gz
tar -tjf logs.tar.bz2
tar -tJf logs.tar.xz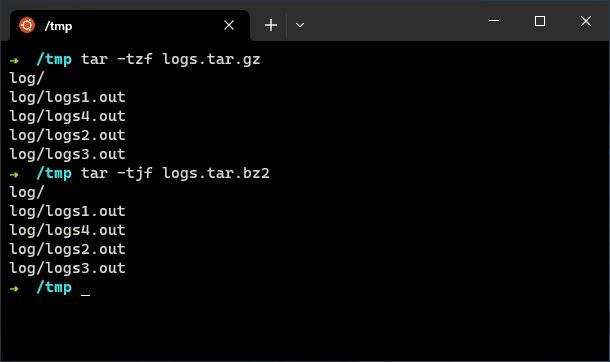
How to untar a gz file
To extract files from an archive that has been compressed, its the same principle, include the compression filter option used for the archive file with -x.
tar -xzvf logs.tar.gz
tar -xjvf logs.tar.bz2
tar -xJvf logs.tar.xz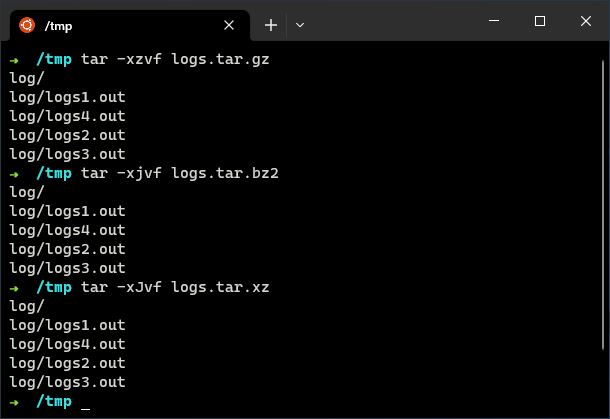
As you can see from the above output, the archive files are extracted with the previously created directory structures.
How to exclude files in tar
If there are certain files or directories you wish to exclude from a tarball there is an option for that…Any guess to what it is???
That’s right, it’s the exclude option. Pretty clever. To exclude a file execute the command with the –exclude switch.
tar -czvf logs.tgz --exclude='logs4.out' logThis tars all the files in /tmp/log except for logs4.out, its been excluded from the archive contents.
# ls log
logs1.out  logs2.out  logs3.out  logs4.out

# tar -czf logs.tgz --exclude='logs4.out' log

# tar -tzf logs.tgz
tmp/log/
tmp/log/logs1.out
tmp/log/logs2.out
tmp/log/logs3.out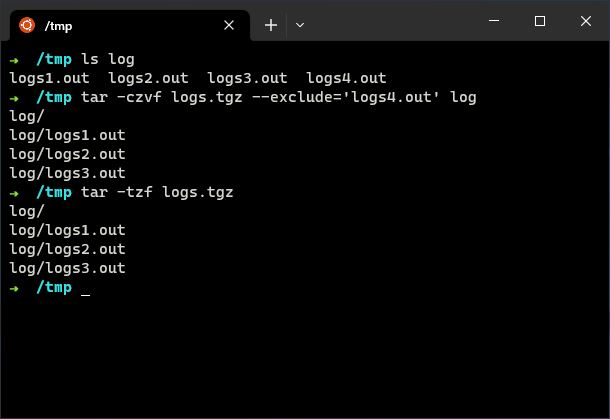
Conclusion
The tar command allows users to quickly store a lot of files and directories into a single file, where the file can then be saved to tape archive, or stored locally on the system.
Its versatility and ease of use makes it an essential tool for any serious linux admin. I’ve only scratched the surface with the usefulness of the tar command in this article.
I would encourage you to read the man pages for the tar command, there many command line options that change the behavior of tar.
# man tar